Winclone
Resizing a Bootcamp Partition with Winclone
Overview
Winclone allows you to resize your Bootcamp partition. This process consists of shrinking the size of the current bootcamp partition, creating an image of the current bootcamp partition, deleting the current partition, creating a new partition with a new size, then restoring the Winclone image.
BACKUPS
Make sure you have a good file based backup of all data on all partitions prior to starting these steps. While Winclone has been tested in a variety of setups, there is still a possibility of data loss due to hardware or software issues during the clone and restore process.
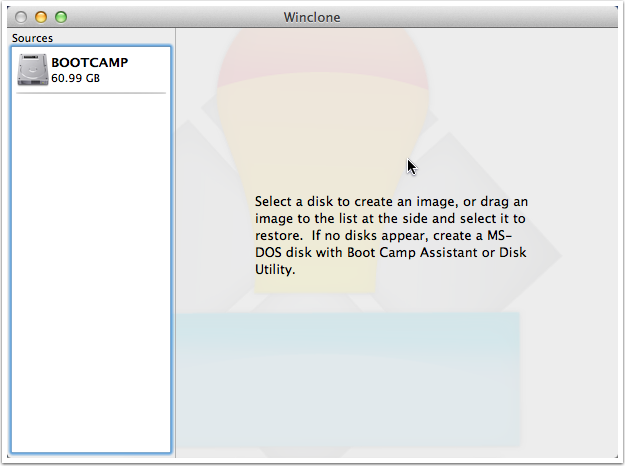
1. Open Winclone
Launch Winclone, and your current Windows partition should appear in the Sources list.
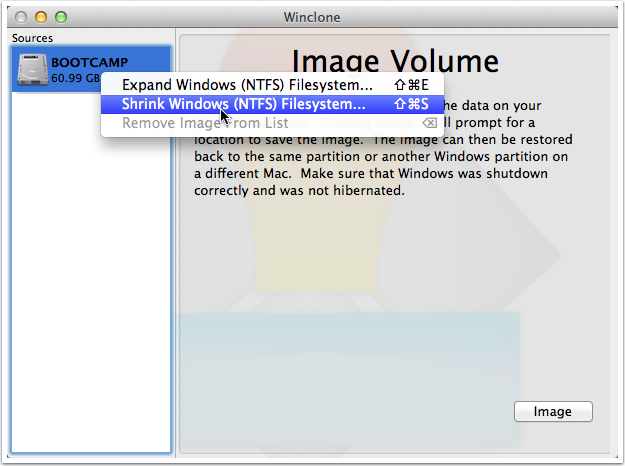
2. Shrink Filesystem
If you are going to be restoring Windows on a partition that is smaller than the current partition, you need to shrink the filesystem first. If not, skip to step 7.
To shrink the NTFS filesystem, control-click on the bootcamp volume and select Shrink Windows (NTFS) Filesystem.
3. Resize Confirmation
Verify that you want to shrink the filesystem.

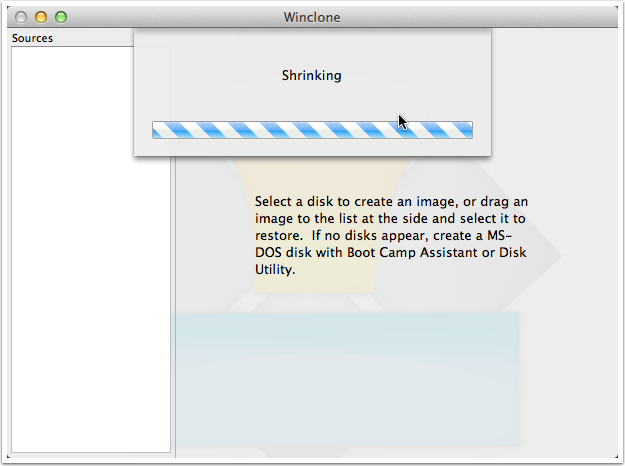
4. Shrink Operation
The filesystem will be reduced to the smallest size possible.
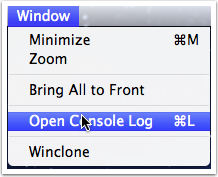
5. Resize Progress
If you want to see the resizing progress, select Windows->Open Console Log.
6. Resize Verification
After the bootcamp partition has been resized, you will see the new filesystem size. Note that this is the smallest partition size available and you'll need a bootcamp partition that is the same size or larger to restore the filesystem.
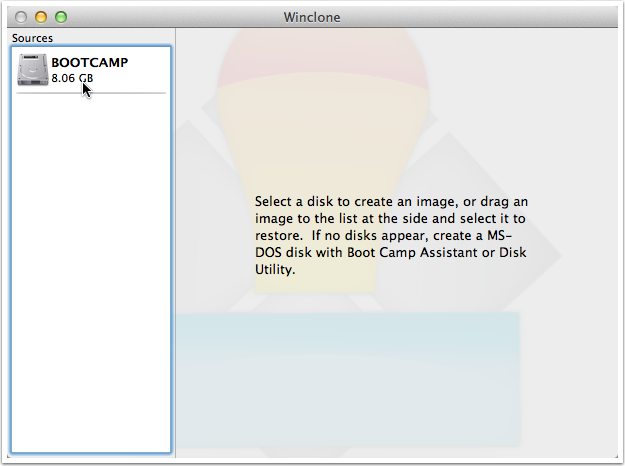
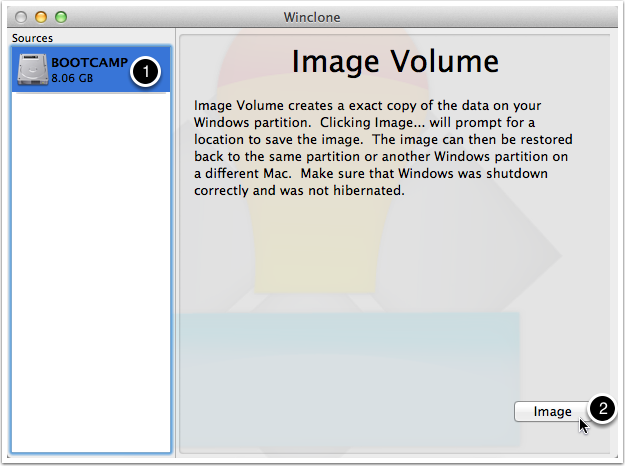
7. Imaging the Bootcamp Partition
You are now ready to create an image of the bootcamp partition.
- Select the Bootcamp partition.
- Click Image.
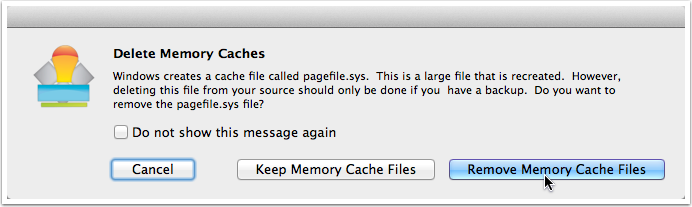
8. Memory Caches
Windows keeps a large file called a pagefile.sys on the Bootcamp partition. This file takes up a lot of space and is recreated on startup. However, if a drive is already failing or has corruption on it, deleting files may cause issues. Select to Keep Cache Files or Remove Memory Cache Files.
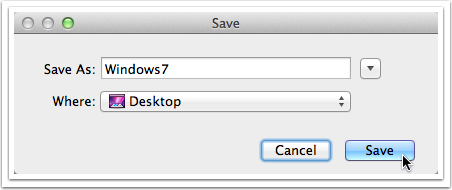
9. Save
Give the image a name, and save it to a Mac formatted drive. In this example, the image is saved to the Desktop.
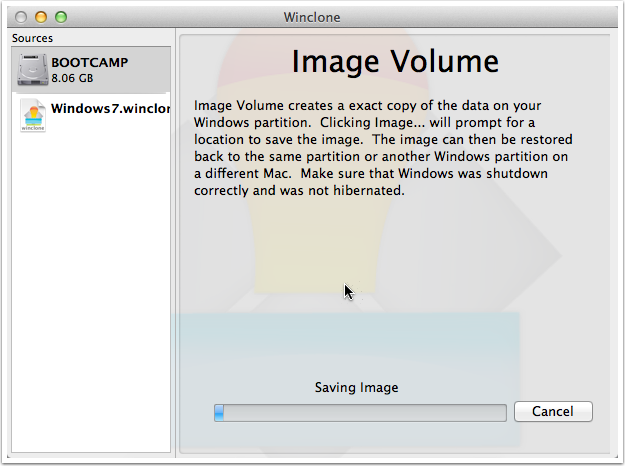
9. Image Creation
The Winclone image will now be created. Depending on the size of your bootcamp partition, this may take a while.
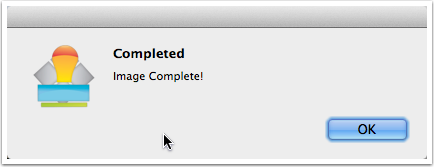
10. Completion of Image Creation
Once the imaging process completes, you'll see a confirmation.
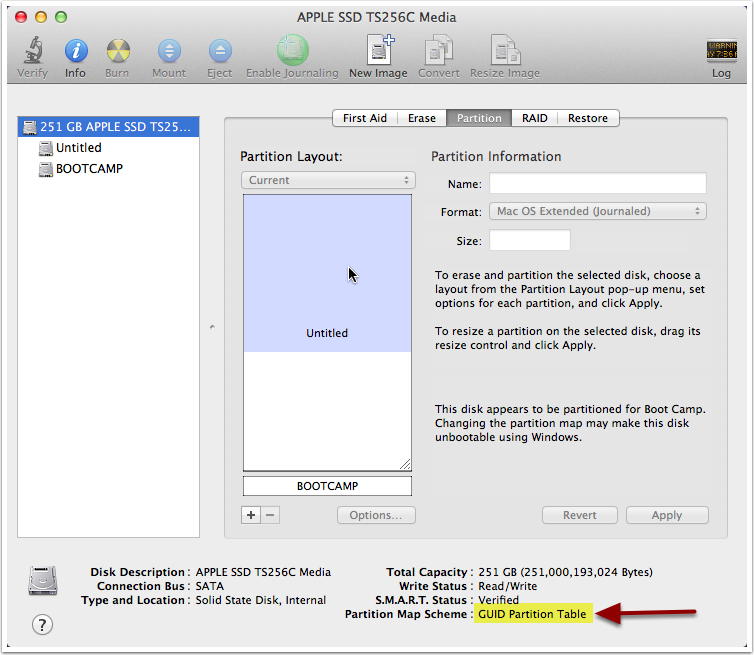
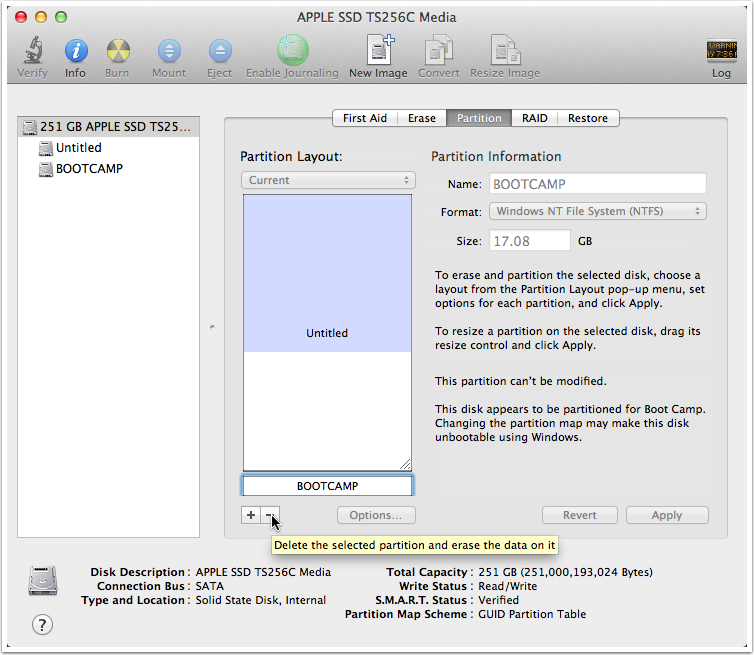
11. Removing and Creating a new Bootcamp Partition
Open Disk Utility in the Utilities folder, select the drive and then select the Partition tab.
12. Delete BootCamp Partition
MAKE SURE YOU HAVE A FILE BASED BACKUP OF YOUR WINDOWS PARTITION PRIOR TO THIS STEP. This will destroy any Windows data on your bootcamp partition, and if you are unable to restore the image you created in the prior steps, all data will be lost. Make sure you have a file based backup of all files on the disk prior to this step.
Remove the prior Bootcamp partition by selecting it pressing the "-" button.
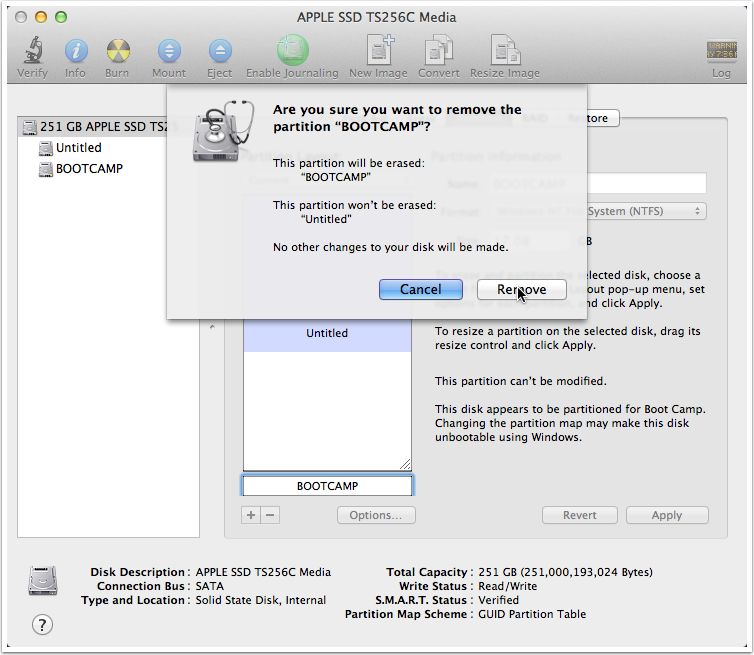
13. Remove Partition
MAKE SURE YOU HAVE A FILE BASED BACKUP OF YOUR WINDOWS PARTITION PRIOR TO THIS STEP. This will destroy any Windows data on your bootcamp partition, and if you are unable to restore the image you created in the prior steps, all data will be lost. Make sure you have a file based backup of all files on the disk prior to this step.
If you have a good backup, click Remove.
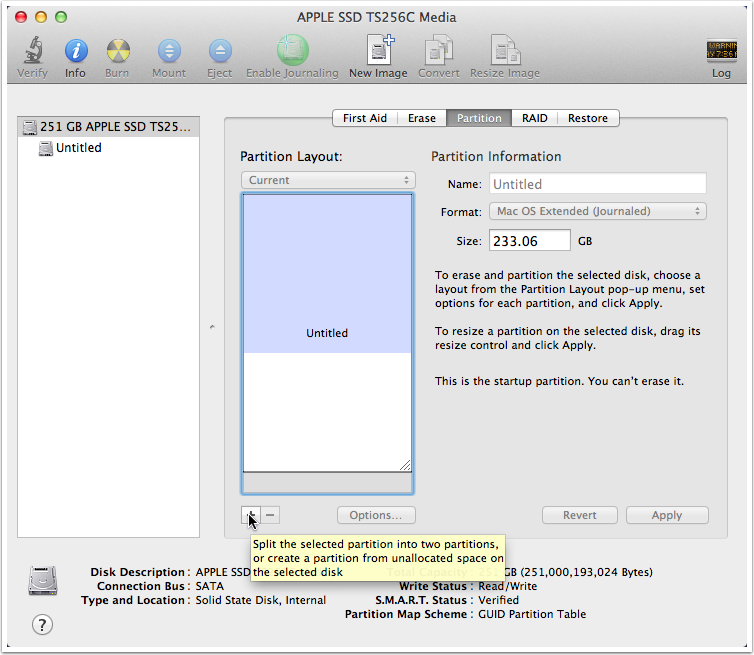
14. Create New Windows partition
To create a new Windows partition, click +.
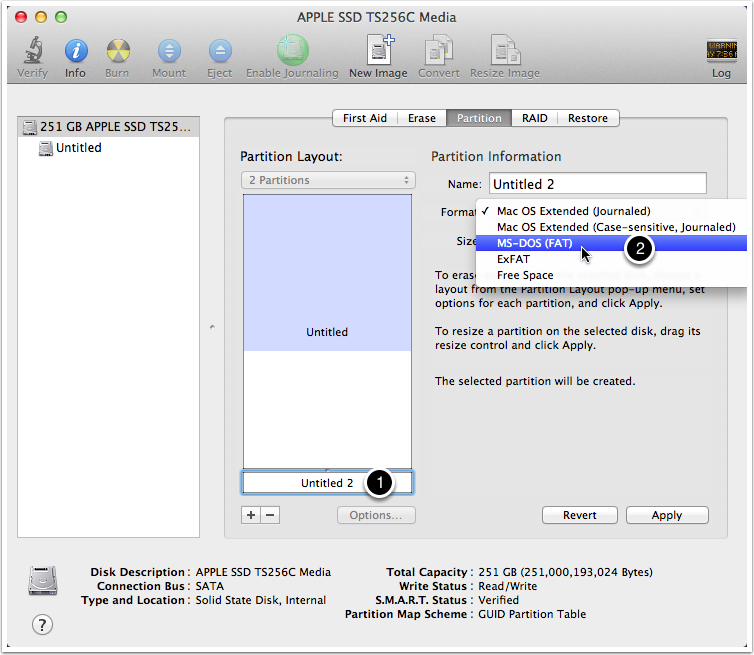
15. Set Filesystem Type
In order for Winclone to see the partition, it must be formatted as FAT.
- Select the new partition.
- Set the format to MS-DOS (FAT)
16. Resize Partitions
You can now drag the divider between the partitions to set the size you would like for the Windows partition and the Mac partition.

17. Bootcamp Partition Name
Give the new partition a name to easily recognize it in Winclone.
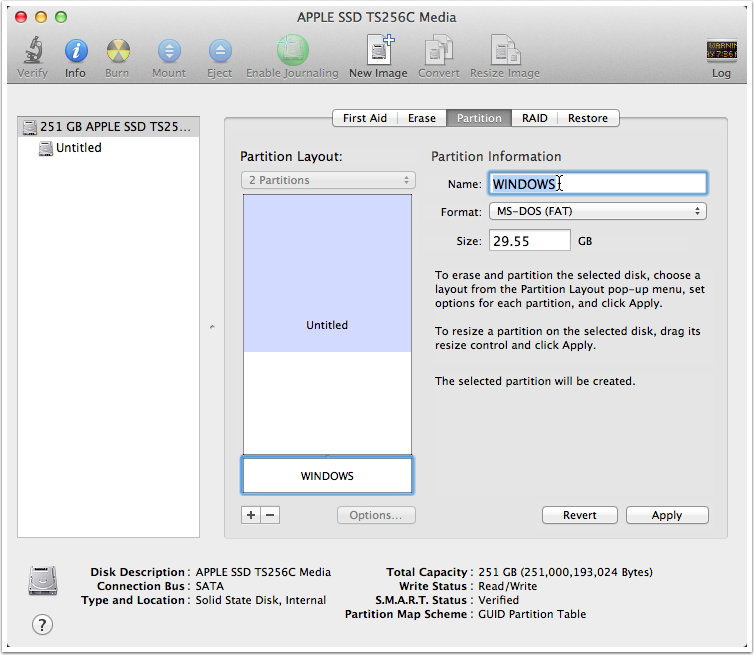
18. Apply Changes
Click Apply to resize the Mac partition and create a new Windows partition.

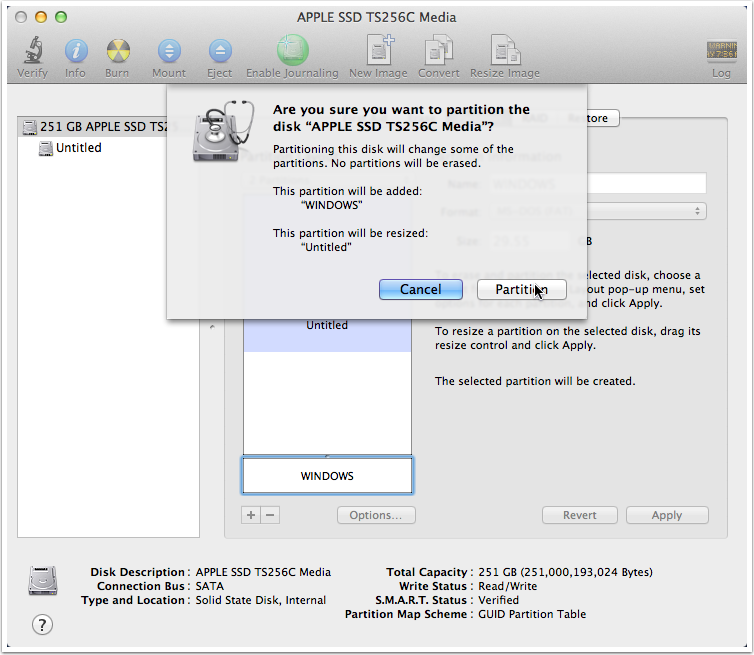
19. Verification
Disk Utility will verify the operations that it is performing. Make sure that the Mac partition is being resized and that the bootcamp partition is being added. If this is correct, click Partition.
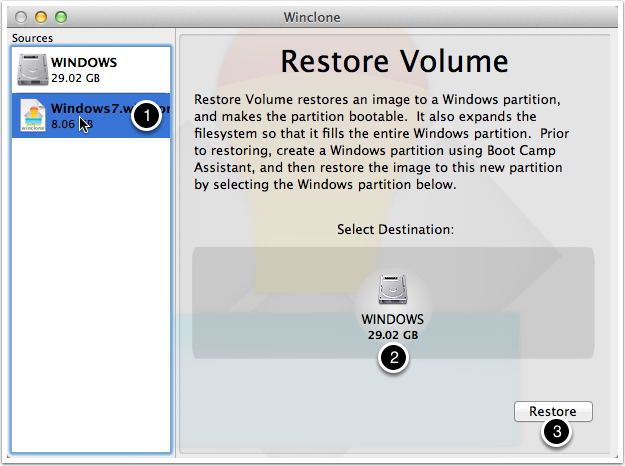
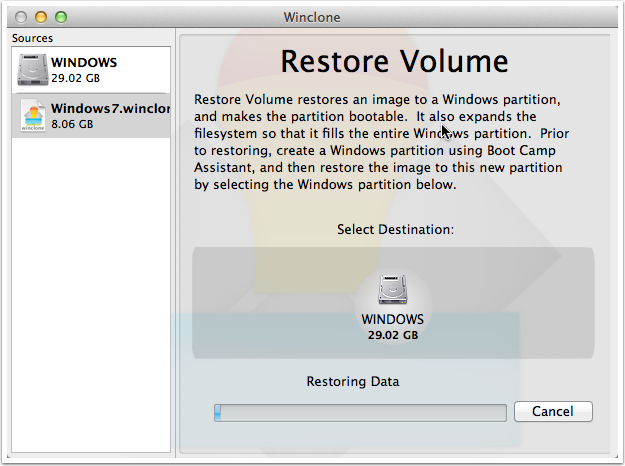
20. Restoring the Winclone Image
Back in Winclone, select the Winclone image you created, select the bootcamp volume, then click Image...You do not need to quit and relaunch Winclone, as it will detect any new partitions.
- Select Image
- Select Bootcamp partition
- Click Restore
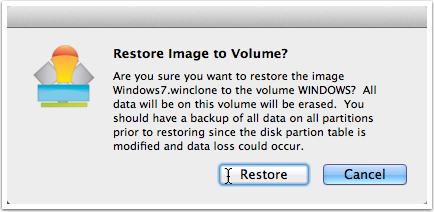
21. Verification
You will be asked if you want to restore. Verify that the correct partition is being restored to, and click Restore.
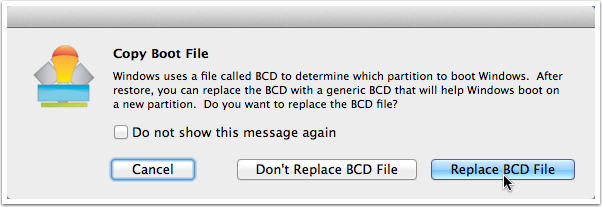
22. Copy Boot File
In Windows Vista and Windows 7, Windows uses a boot file called BCD to determine which partition is used to boot. If you did not do any custom BCD configuration, select "Replace BCD".
23. Restoring Status
The restoration will start. It may take a while depending on the size of the image. You can see detailed information on the progress by selecting Window->Show Console Log.
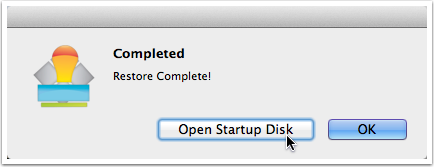
24. Completion and Startup Disk
Once restoration is complete, click Open Startup Disk to select the Windows partition to boot into.
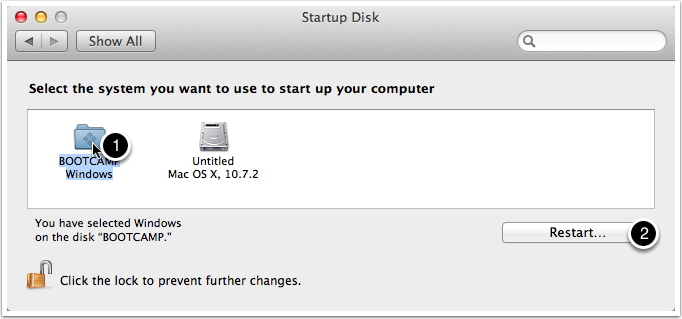
25. Startup Disk
Select your bootcamp partition.
- Select the Windows folder.
- Click Restart
Once rebooted into Windows, if the filesystem expanded, a disk check will be performed, and then Windows will reboot. After this reboot, you'll have a fully restored system.